CharoStudio subscription service usage tutorial on various systems
CharoStudio subscription service usage tutorial on various systems
CharoTutorials & Downloads by Operating System
⚠️ Note: Unless you are in a unique network environment, all operations including downloading, updating subscriptions, and pulling configuration files should be performed with your client’s System Proxy feature turned off.
After purchasing the service, you will receive your exclusive subscription link or QR code. Please refer to the corresponding client setup guide below based on your operating system:
iOS (iPhone / iPad) & MacBook (Apple Silicon / M-Series)
- Recommended Client: Shadowrocket
Shadowrocket Setup & Subscription Guide
Open Shadowrocket
💡 App Acquisition:
- Annual Subscribers: Contact me directly to get the app download link;
- Non-Annual Subscribers: Must purchase and download using a non-mainland China App Store account (Shadowrocket is a paid app).
Scan QR Code to Import Subscription
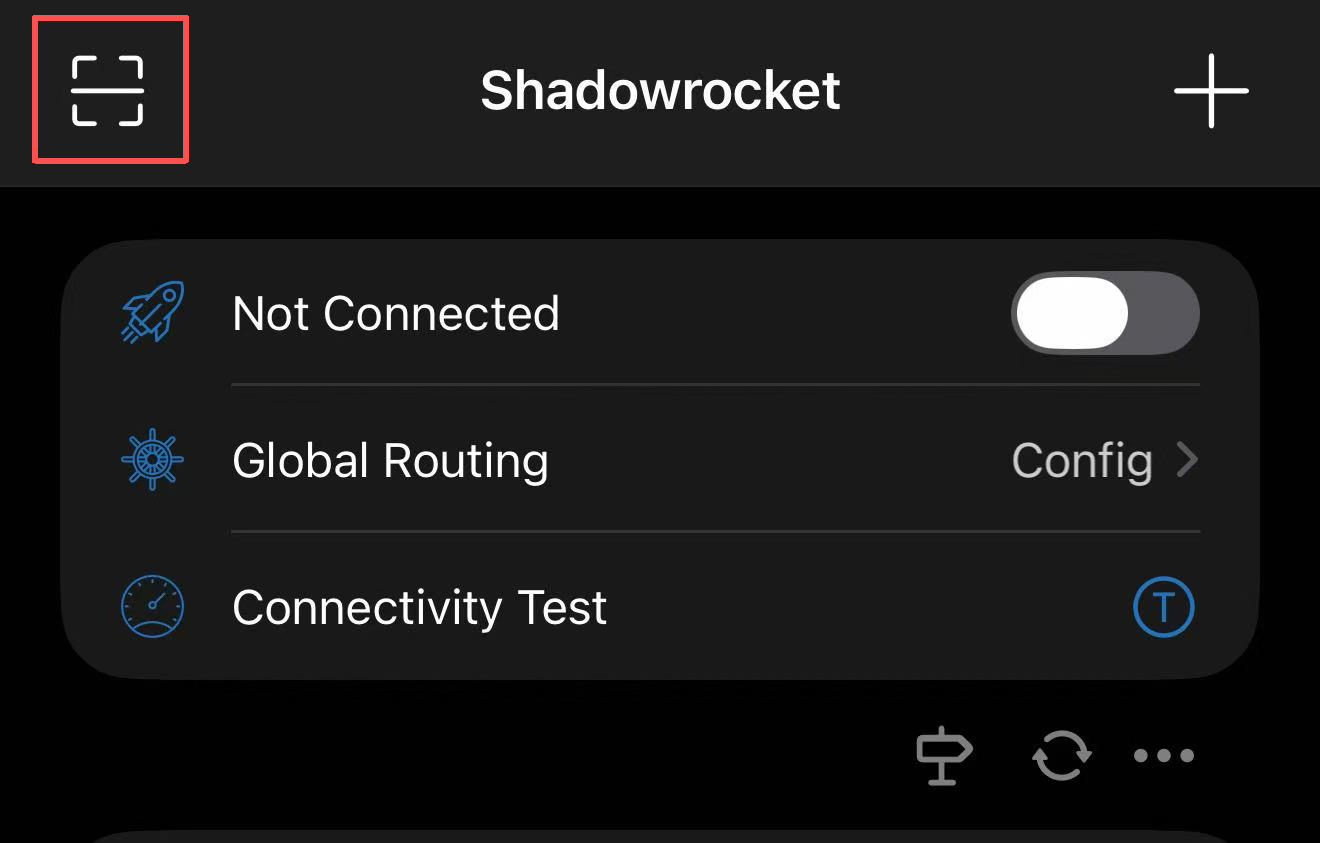
- Open the app and tap the Scan Icon in the top-left corner of the homepage;
- Scan your provided subscription QR code, and wait for the node list to finish loading.

Select Node & Connect
- Once loaded, tap to expand the subscription node list;
- Locate and tap to select an IEPL Node (a small orange dot will appear on the left of the selected node);
- Confirm your selection and toggle the Switch Button in the top-right corner of the homepage to start the service.
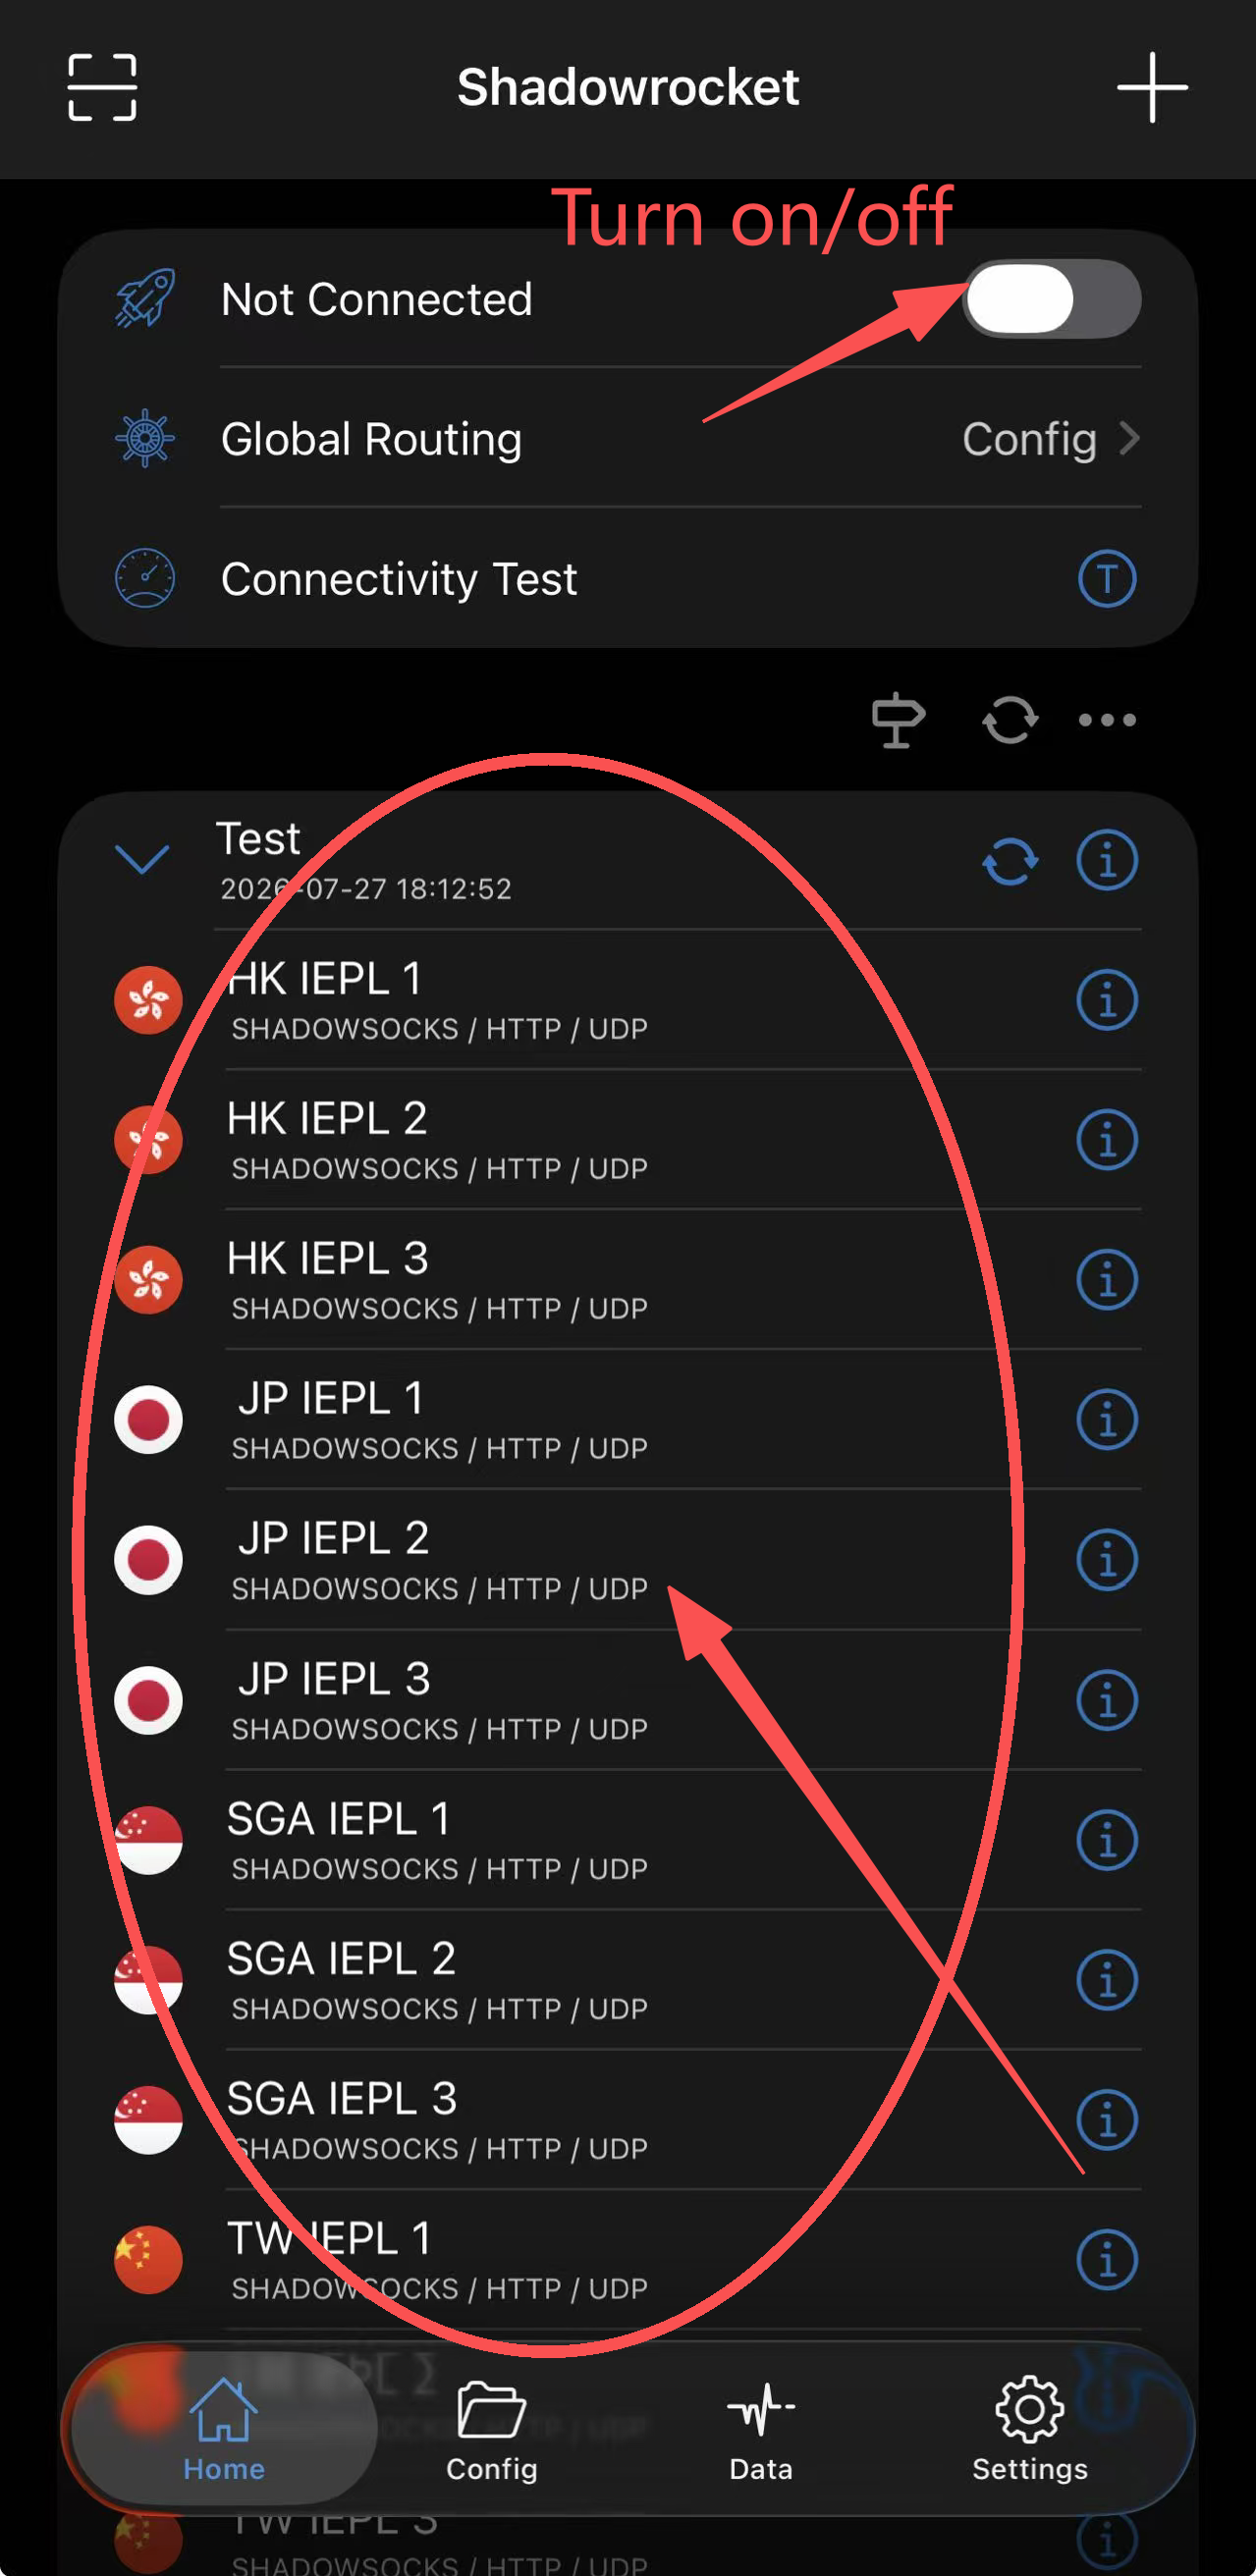
⚠️ First Connection Note: When toggling the switch for the first time, a system prompt asking to “Add VPN Configurations” will appear. Tap “Allow” and verify with your Passcode/Face ID to complete setup.
👉 Advanced Configuration: Shadowrocket Routing Configuration Deployment Guide (Includes Detailed Settings)
Windows & MacBook (Intel)
- Recommended Client: Clash Verge
Clash Verge Setup & Configuration Guide
📥 Step 1: Client Download & Installation
- Windows (64-bit): Click to Download Clash Verge
- macOS (Intel): Click to Download Clash Verge
💡 Installation Tip: After downloading, double-click to run the installer and click “Next” using default options to complete the installation.
⚙️ Step 2: Import Subscription & Configure Nodes
Import Subscription
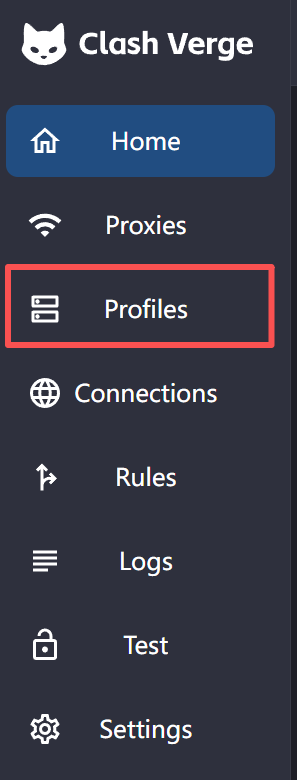
- Open Clash Verge, and click Profiles on the left navigation bar to enter the configuration page;
- Paste your Subscription URL into the “Import profile URL” input field at the top, and click the Import button on the right.
Activate Profile
- After a successful import, a new subscription profile card will appear below. Click to select it (the selected profile will be highlighted with a border).
Select Node
- Click Proxies on the left navigation bar;
- Click Proxy in the top group selector;
- In the “Proxy” tab, you can use “auto mode” by choose Auto or choose the IEPL Node you wish to use from the list.

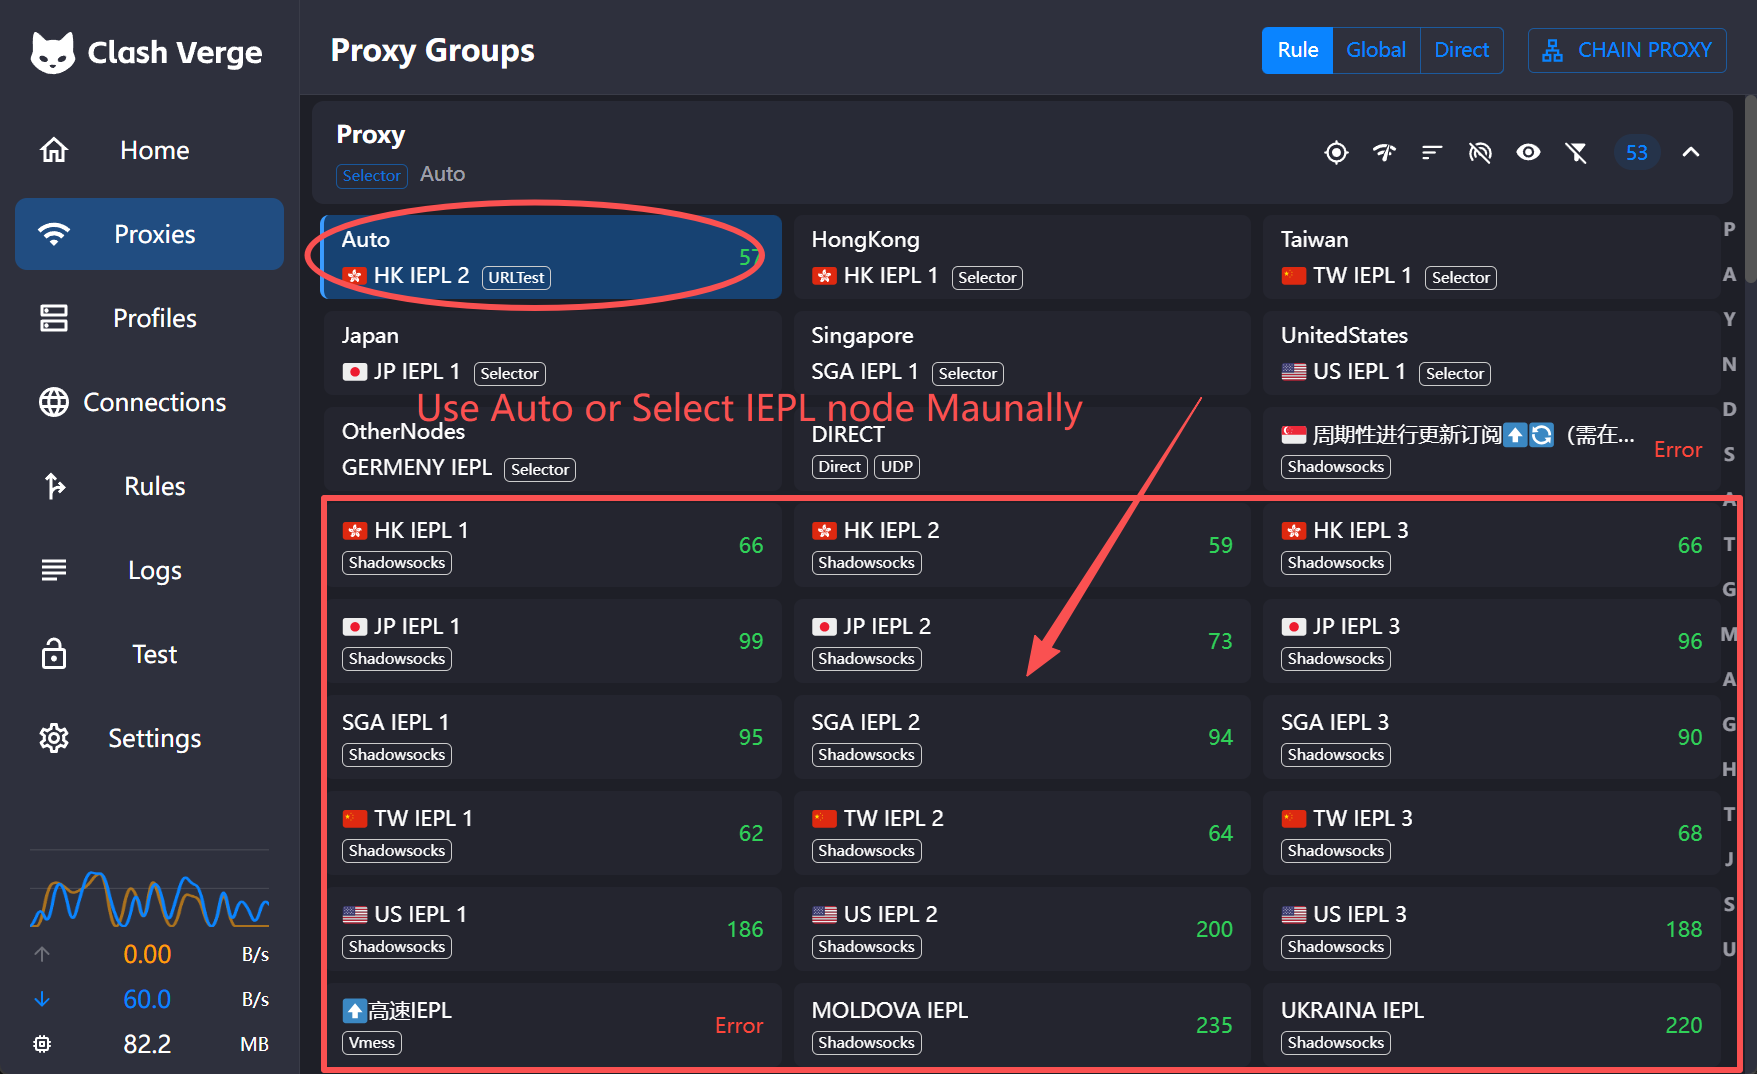
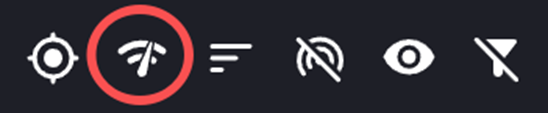
📌 Node Switching Note: To switch nodes in the future, perform this action under the “Proxies” -> “Proxy” tab. You can also click the Latency Test (Lightning Icon) button on the page to check node connection speeds.
🚀 Step 3: Start Service
- Return to the Home page on the left navigation bar;
- Toggle on the System Proxy switch to start browsing normally.
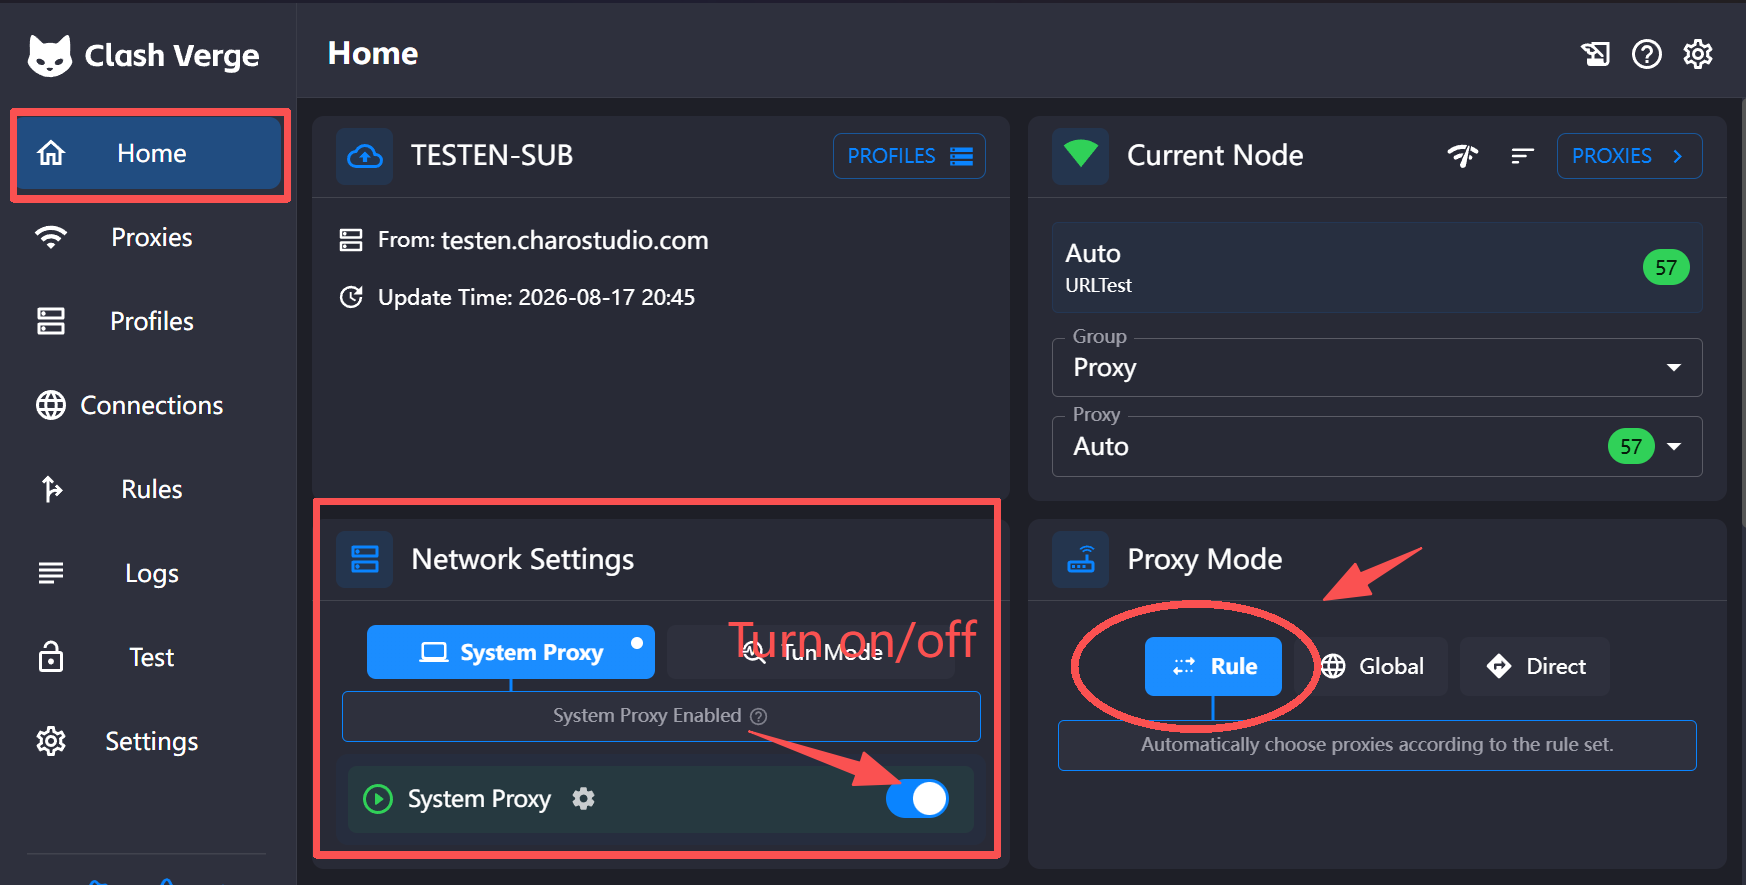
⚠️ Proxy Mode Recommendation: Unless you have special requirements, please keep the proxy mode (Mode) set to the default Rule mode.
Android
- Recommended Client: FlClash for Android
FlClash (Android) Setup & Configuration Guide
📥 Step 1: Client Download & Installation
Android (ARM32/v7a): Click to Download FlClash
Android (ARM64/v8a): Click to Download FlClash
💡Version differences💡
⚠️arm64-v8a
An 8th-generation, 64-bit ARM processor architecture.
- Industry Context: The Android app ecosystem has fully transitioned to 64-bit architecture, with mobile chip platforms gradually phasing out backward compatibility for legacy 32-bit applications.
- Recommended Specs: Modern 64-bit processor-equipped smartphones with 8GB of RAM or more.
⚠️armeabi-v7a
A 32-bit ARM processor architecture (7th generation and later).
- Compatibility: Provides the broadest legacy compatibility across older or budget Android smartphones.
- Target Audience: Ideal for legacy hardware support, though modern 64-bit devices are increasingly moving away from running 32-bit-only binaries natively.
💡 Installation Tip: After downloading, tap the APK file to install. If prompted with “Allow installation from unknown sources”, grant permission according to system instructions and proceed with installation.
⚙️ Step 2: Import Subscription & Configuration
Import Subscription
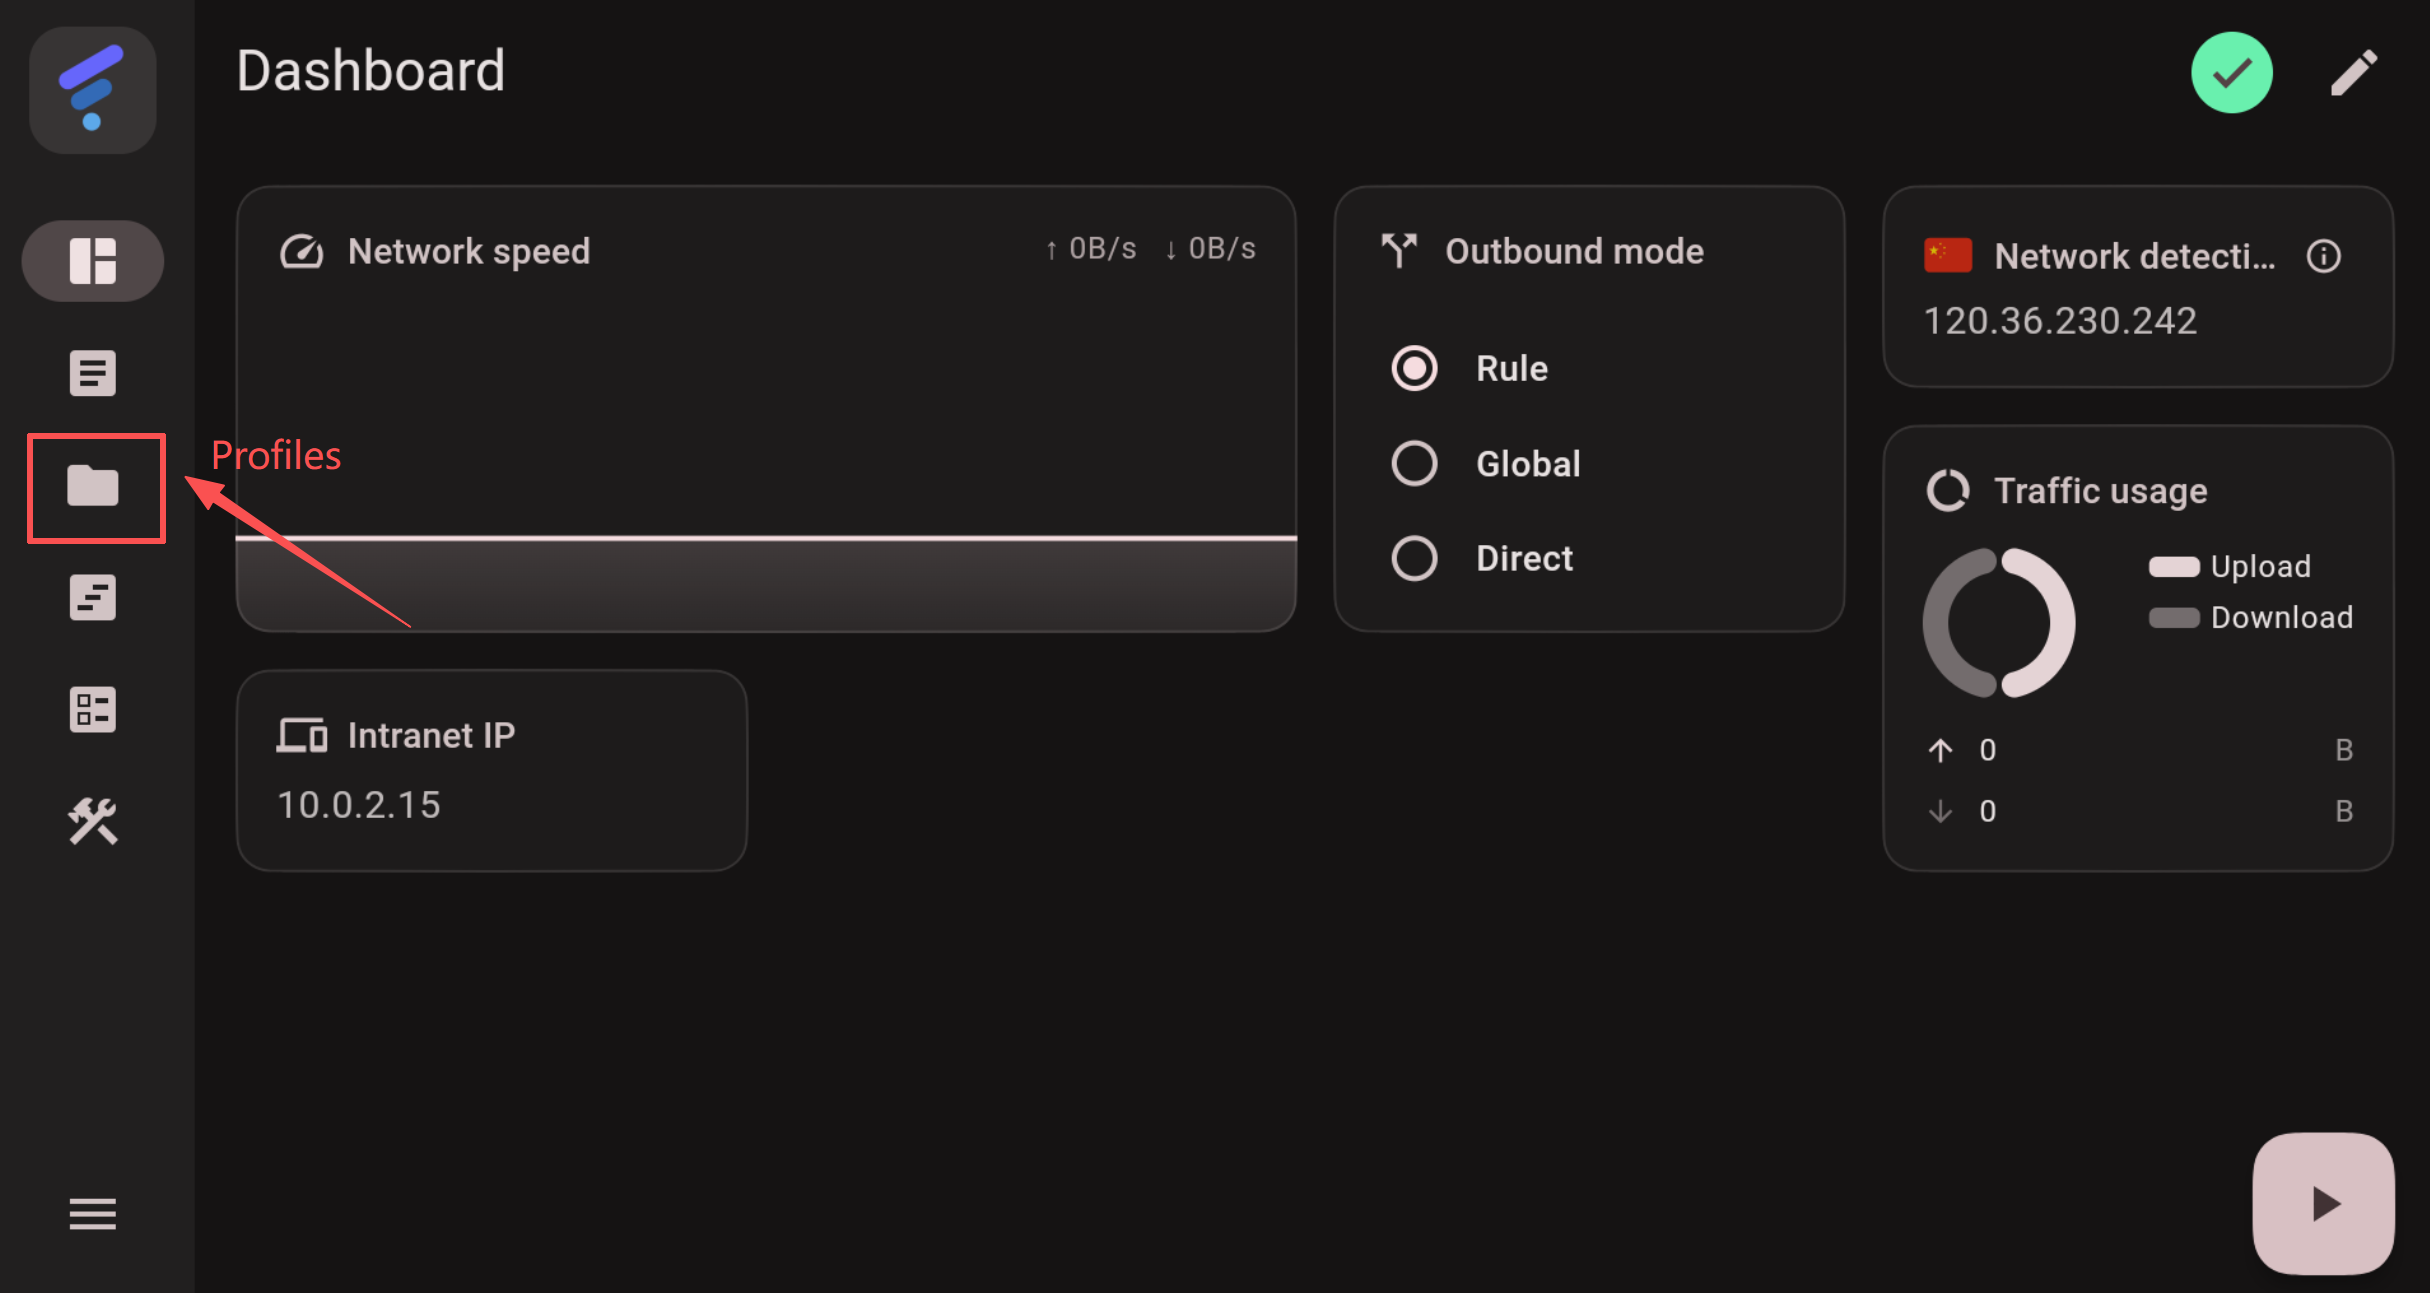
- Open FlClash, and tap Profiles on the left navigation bar;
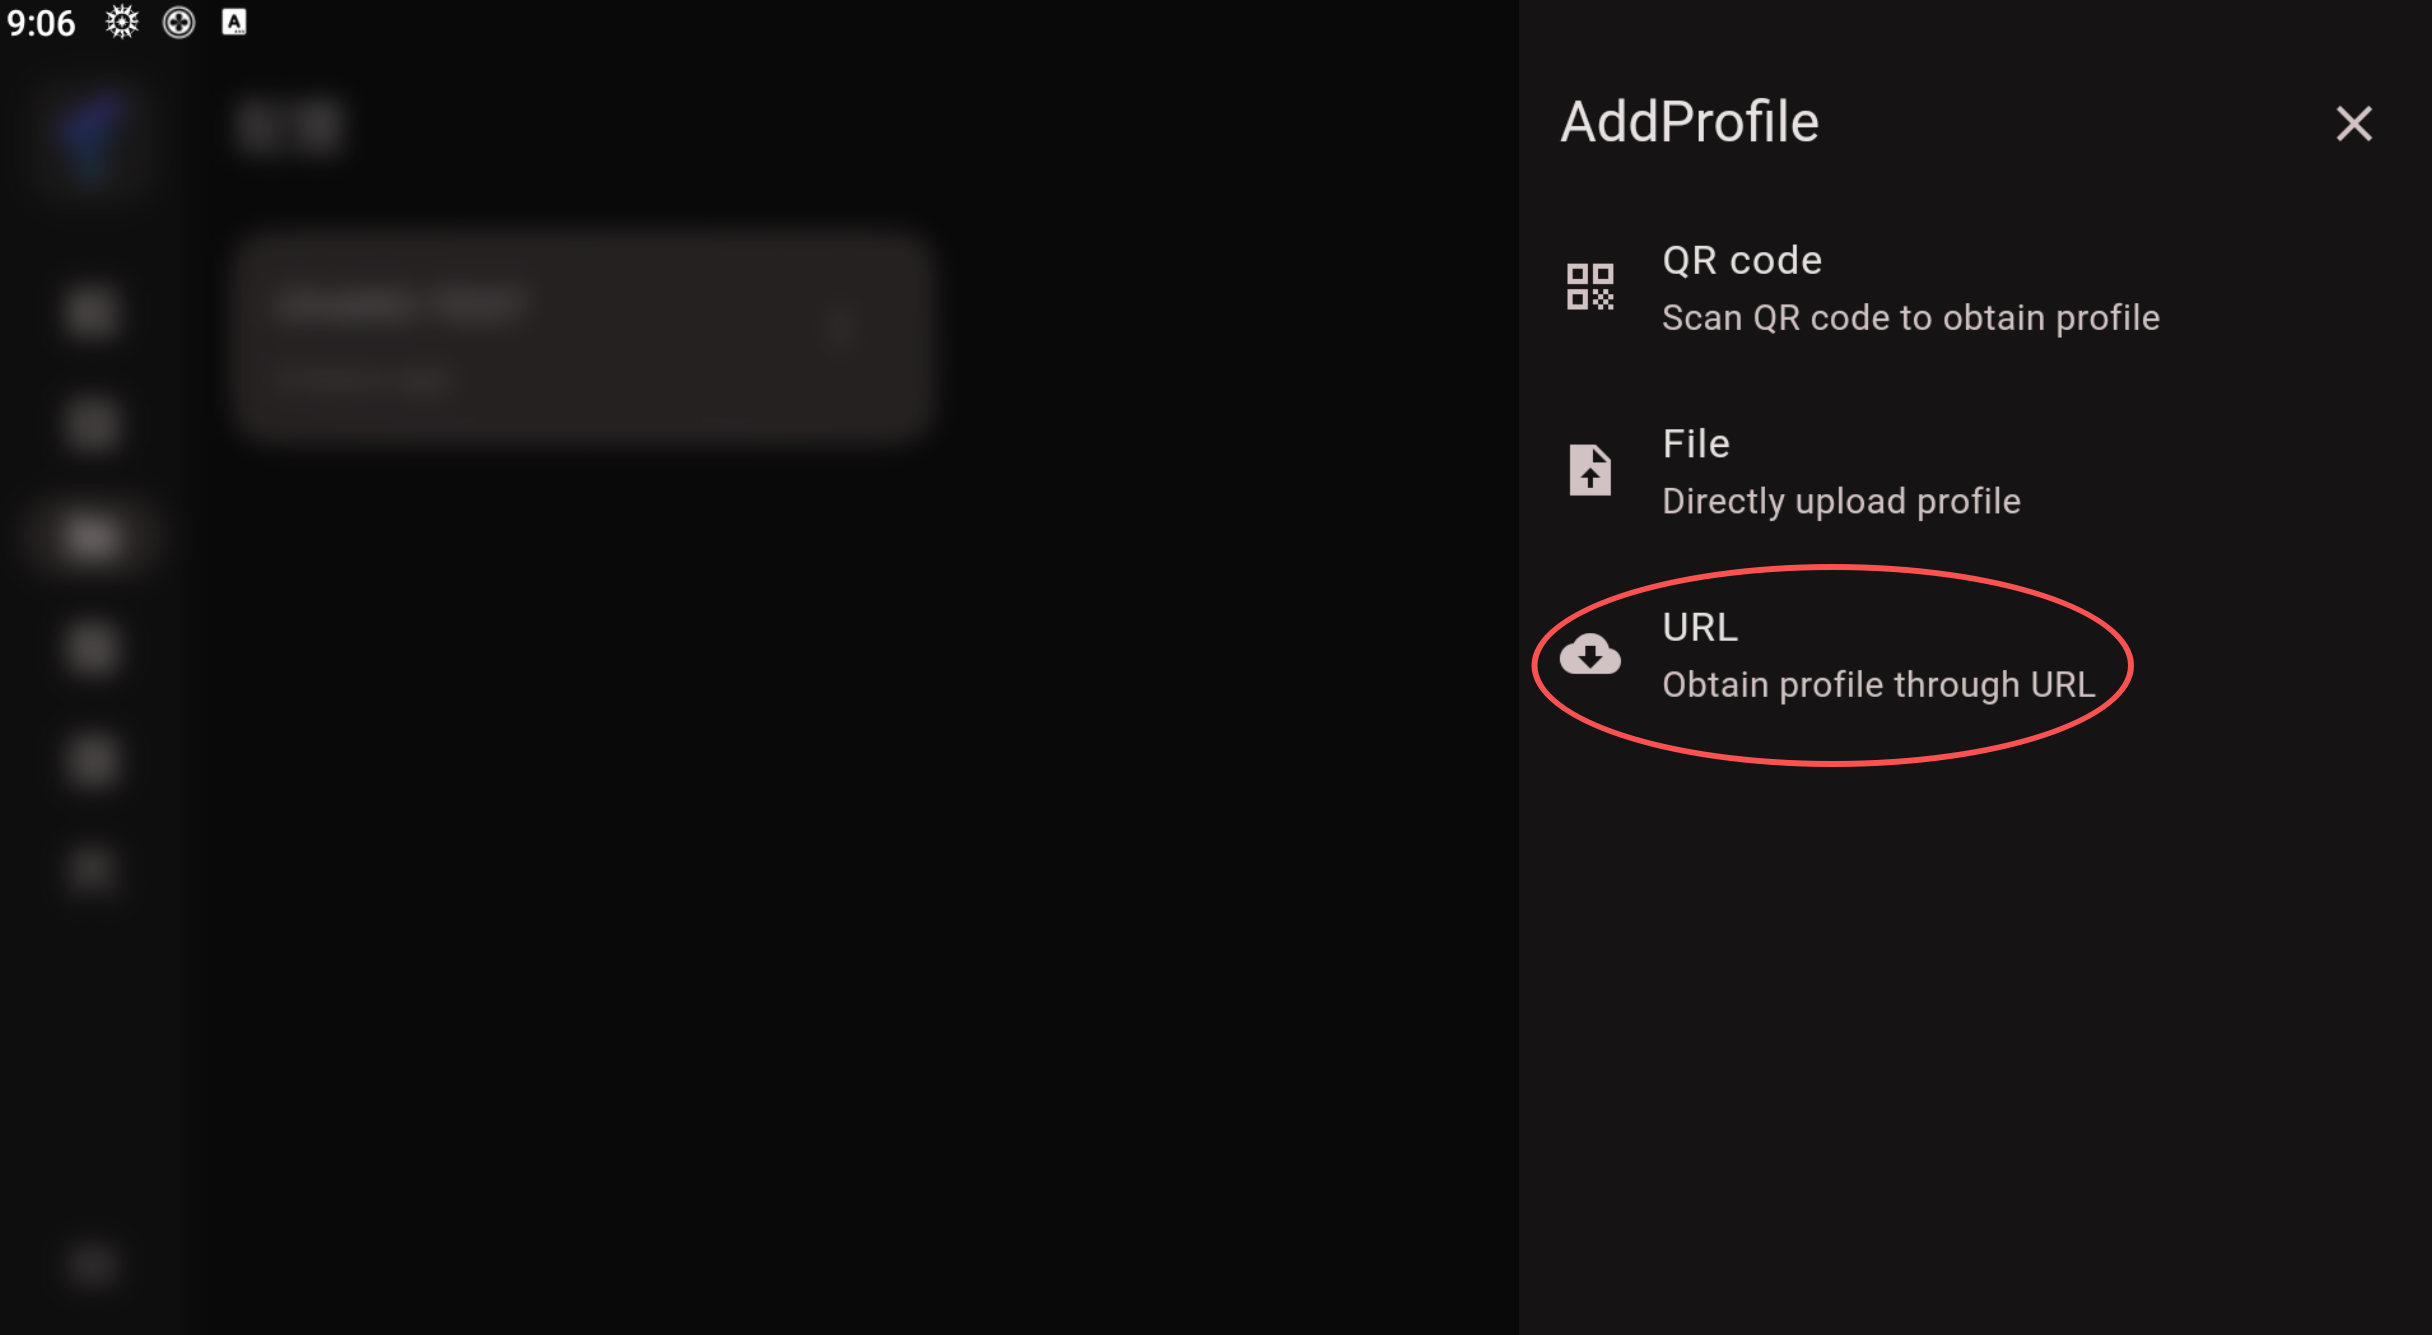
- Tap the
+(Plus) button in the bottom-right corner, and select URL (Fetch configuration via URL);
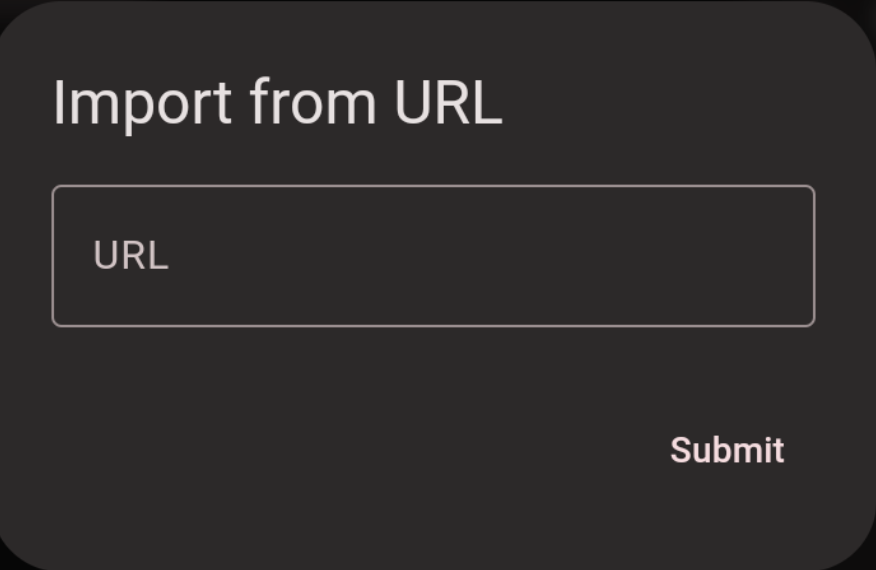
- Paste your Subscription Link into the popup window and tap Submit.
Activate Profile
- A new subscription profile will be generated upon submission. Tap to select it.
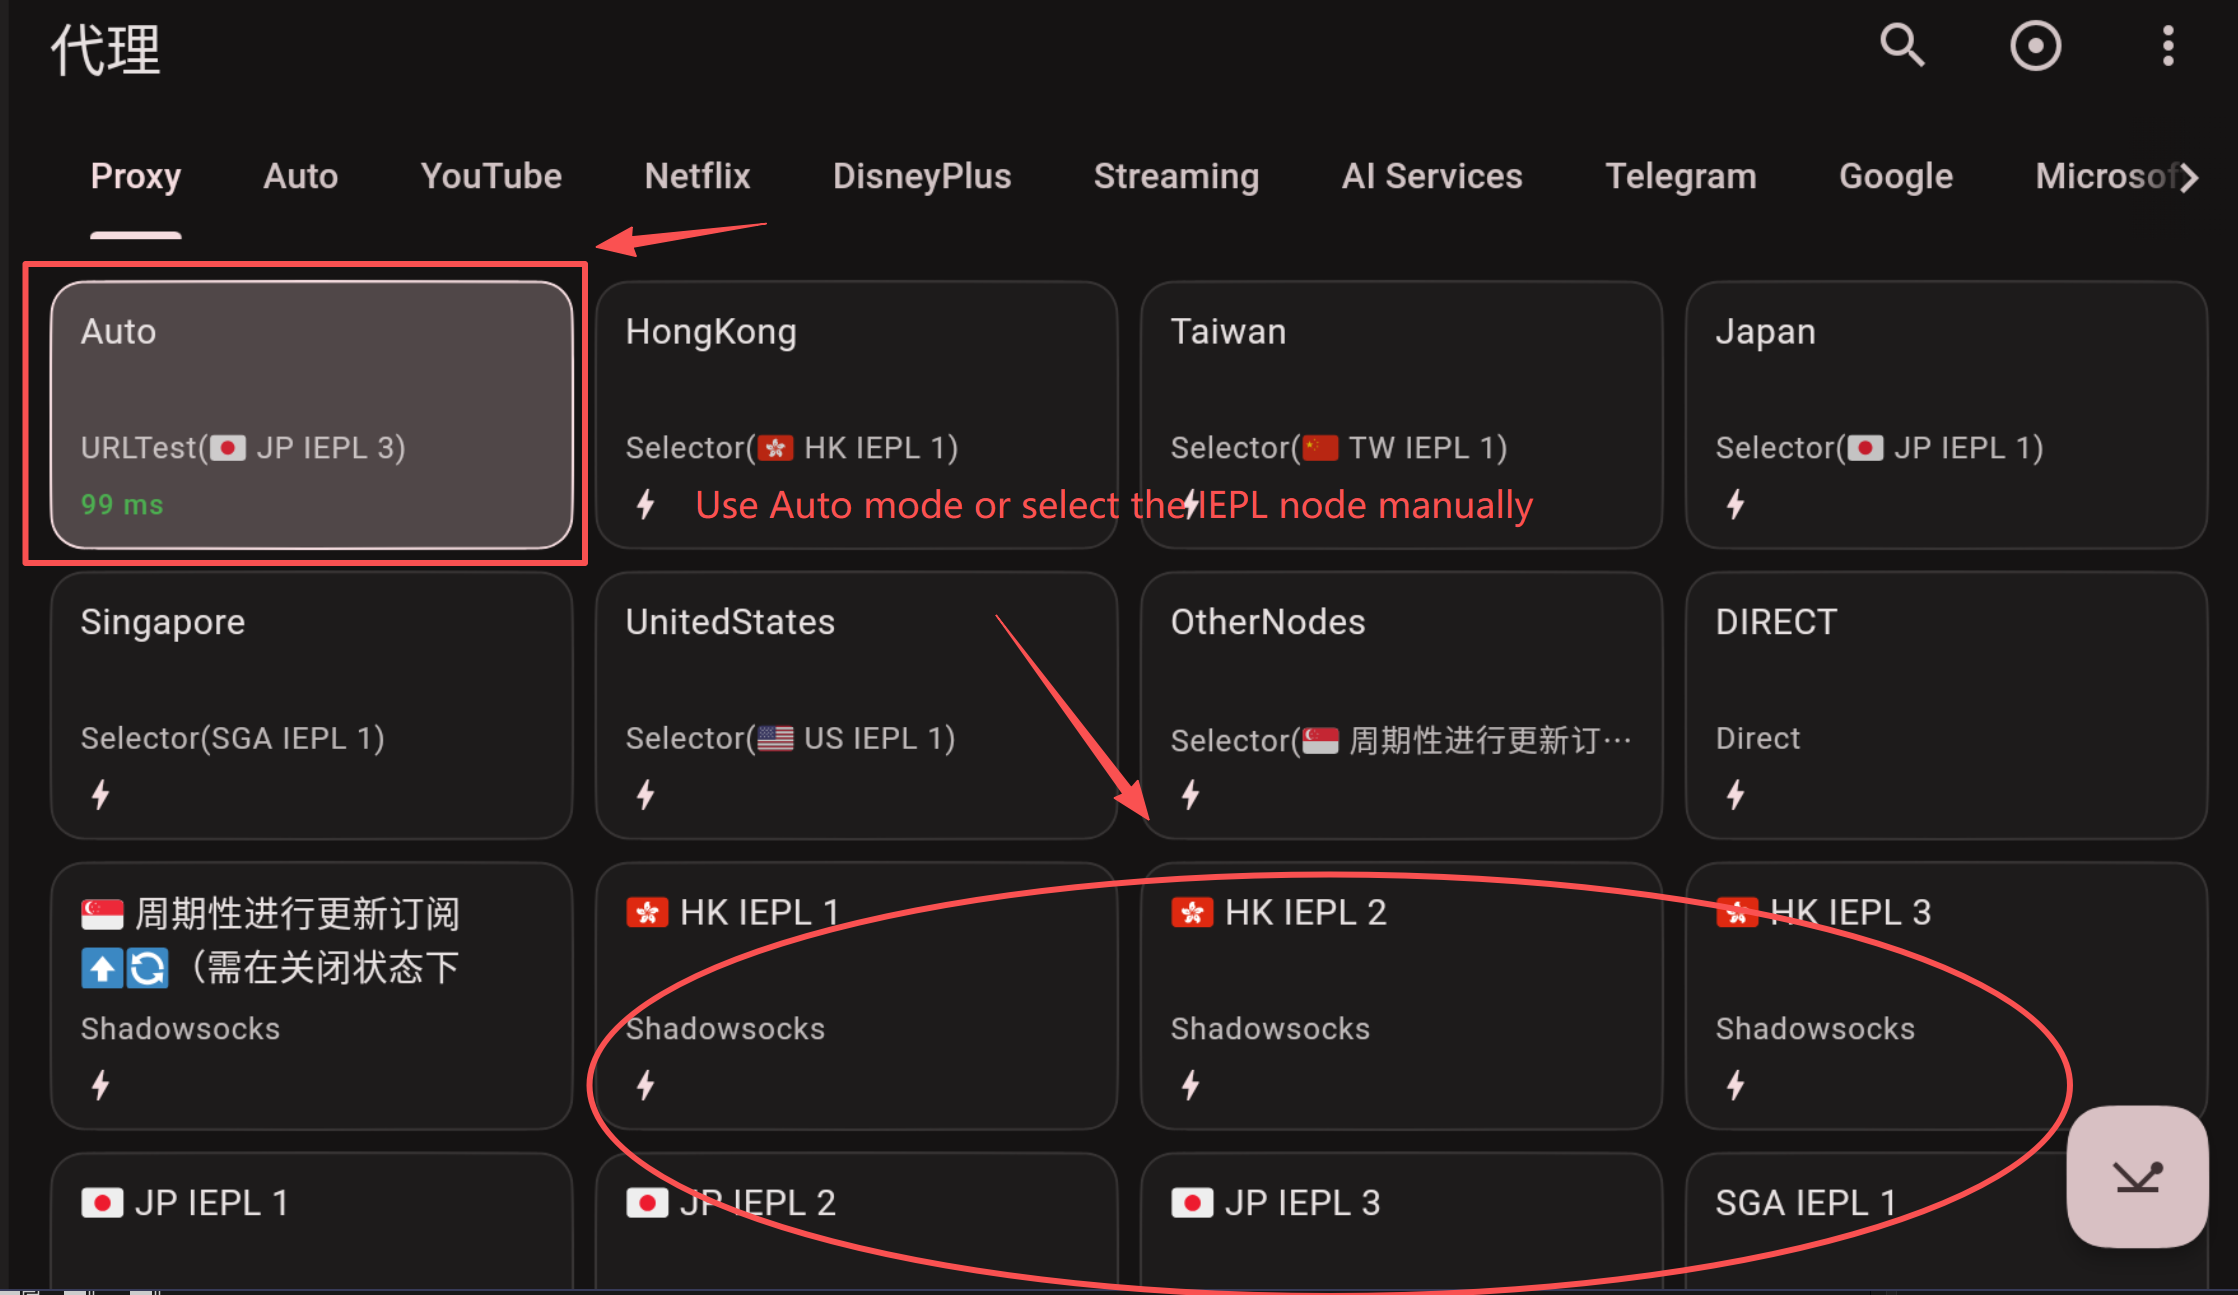
Select Node
- Tap Proxies on the left navigation bar;
- Locate and select Proxy under the top group, then select your desired node from the list.
🚀 Step 3: Start Service & Settings
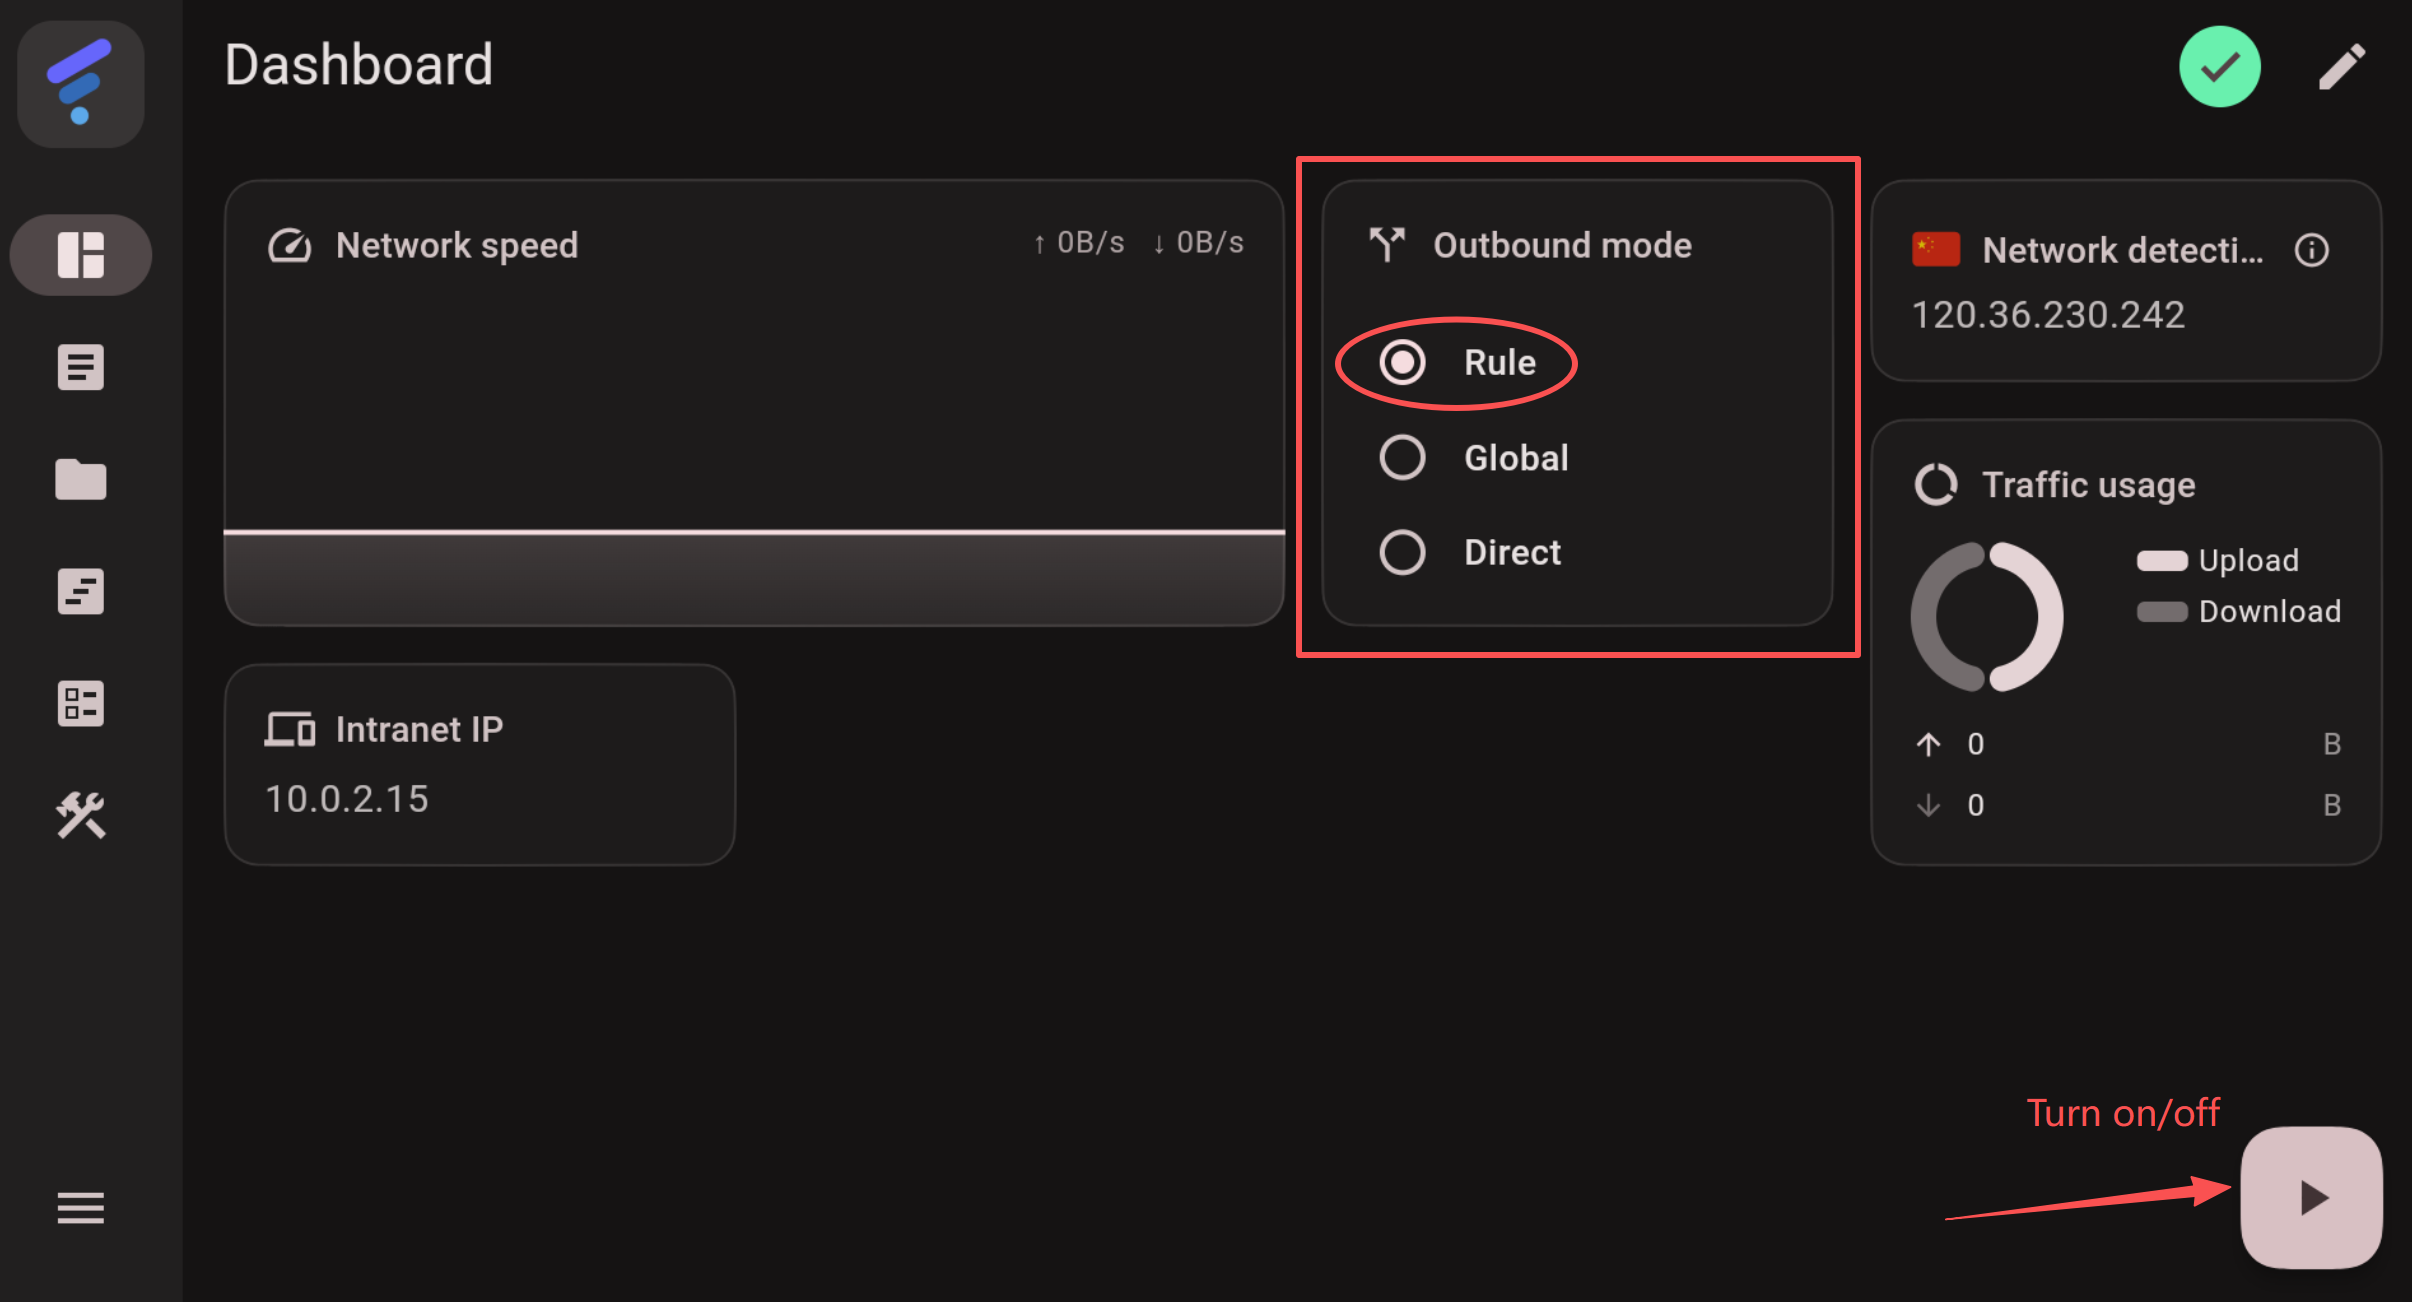
Select Outbound Mode
- Ensure the proxy mode is set to Rule mode (Rule mode is preferred under normal circumstances).
Enable Proxy
- Tap Dashboard on the left navigation bar;
- Tap the Start (Play) Button in the bottom-right corner to enable the proxy switch.
⚠️ First Connection Note: On initial launch, a system prompt asking for “Connection Request (VPN creation)” will appear. Tap Allow or OK to begin using the service normally.
💡 The tutorials above demonstrate basic usage for mainstream clients only. You are free to use other compatible clients of your choice.
🛠️ Encountering Issues? View Troubleshooting & Ticket Submission Guide



.jpg)